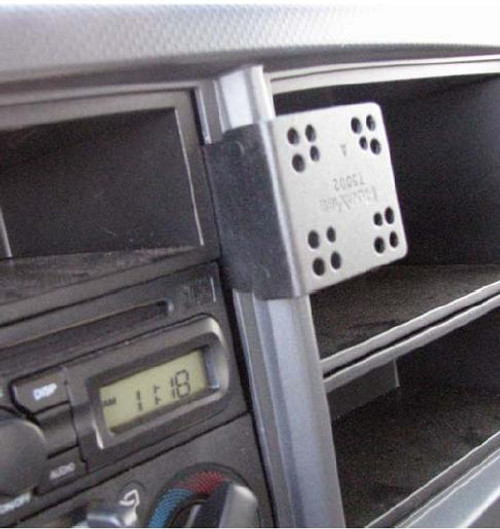
PanaVise Custom InDash Mount for the 2004-2007 Chevrolet Malibu Maxx
Model #: 751101404
The Panavise InDash Custom Mount eliminates exposed holes in vehicle for clean easy and nearly invisible phone mount installation. Proudly made in the USA from the highest quality heavy gauge steel this Panavise Custom Indash Mount has been fitted and produced specifically for your car to provide the utmost convenience and practicality. Complete mounting instructions are included with your purchase and are also available below.
Compatible Cars:
Mounting Instructions
MOUNTING LOCATION: Right side of climate control
TOOLS REQUIRED: Hook tool 9/32" socket & ratchet small Offset Phillips head screwdriver
HARDWARE INCLUDED: None
Step# 01
With hook tool remove the (3) trim strips located to the right of steering column under air bag (4 clips) starting from left side of strip. Then left of radio below ignition switch (2 clips. And left side of steering column (2 clips).
Step# 02
Open the glove box. With offset Phillips head screwdriver remove the (4) screws that hold the glove box door tray in place. Squeeze the sides of the glove box tray to release stopper and remove tray from cavity. This will allow you to get at the 9/32" screw at the lower left corner of glove box. Remove this screw. Continue to remove the (5) 9/32" screws that hold the glove box assembly in place. (3) screws at the top of assembly and (2) at the bottom. Open the passenger door and with hook tool remove the side panel there are (3) clips. Remove the (2) 9/32" screws that hold the glove box in place. Remove the black bezel below the knee panel by releasing (2) clips this will allow the glove box to be removed completely. Glove box bezel is in place between the bezel and dash.
Step# 03
Open the drivers door and with hook tool remove the side panel there are (3) clips similar. Remove the (2) 9/32" screws behind this side panel that hold the knee panel in place. Also remove the (2) 9/32" screws that are at the lower part of the knee panel.
Step# 04
Pullout on the top of the knee panel to release (2) strong clips. Release the black bezel below the knee panel by releasing (3) clips. Tilt down knee panel slightly to allow access to the large radio bezel.
Step# 05
Begin to pull the bezel that surrounds the radio climate control and includes the air vents by pulling from the lower back right side first to release a total of (8) clips that hold this bezel in place. (2) on the left and right sides Bottom Center and Top. And (2) up by the air vents.
Step# 06
Lift off the large bezel and release the emergency flasher switch. Move bezel out enough to get at the lower right screw by the climate control. Remove this screw with 9/32" driver (we suggest magnetic). Place screw in mounting hole on InDash by PanaVise Mount and install mount and screw into hole and tighten screw while aligning mount to the edges of the climate control and notch in place.
Step# 07
Carefully replace the large radio / climate control bezel starting at the top and working your way down to placing the bezel around the InDash by PanaVise Mount. Replace the bezel completely and continue to reinstall the knee panels and lower black bezels (remember the clips from these bezels hold the knee panels in place). Replace the side panels by doors glove box and (3) trim strips.
If we don't have it listed please email us.


